 Adia Sisson
 Adia Sisson
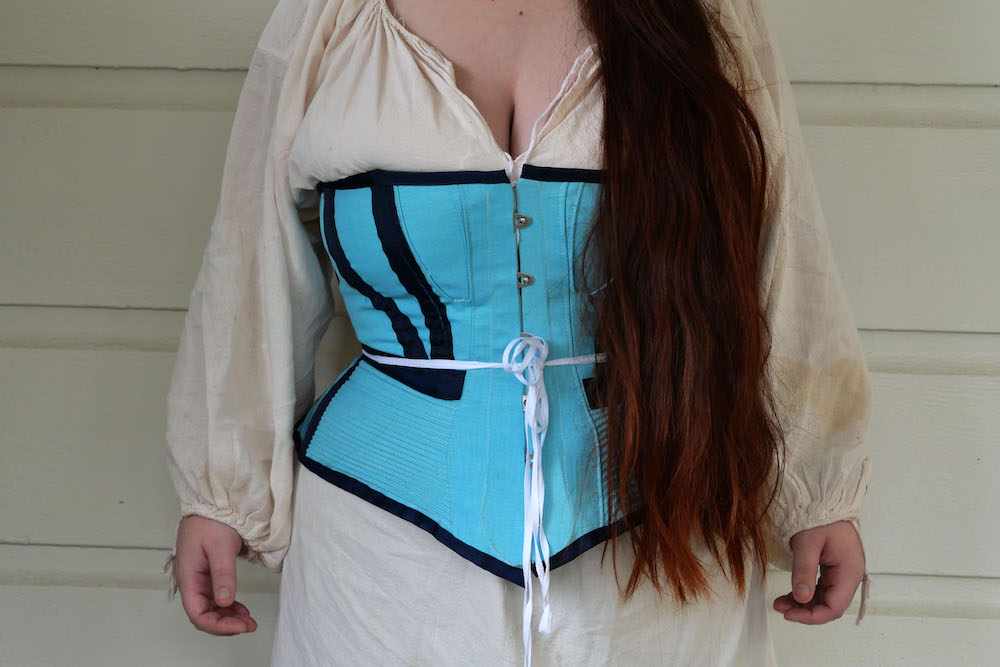
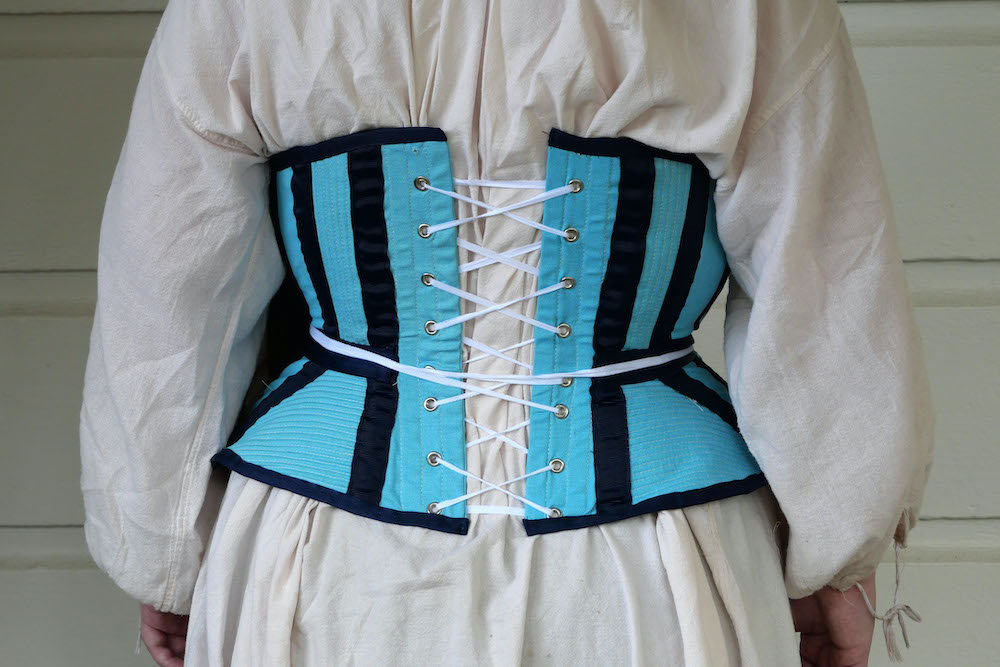
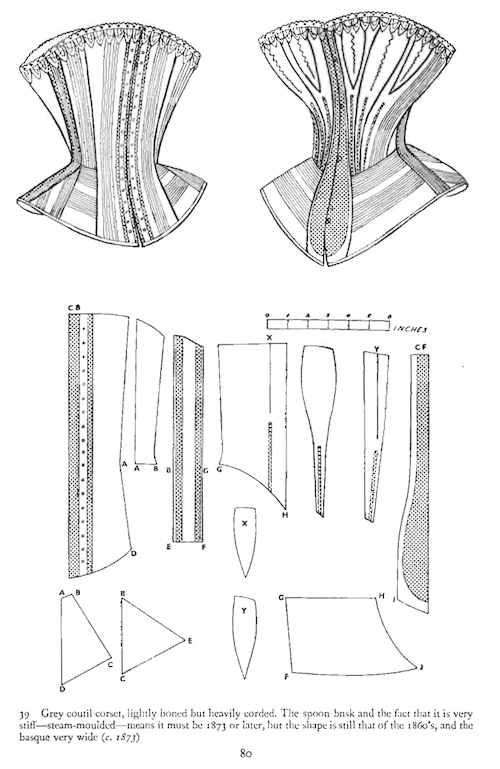
This corded corset follows the pattern from image 39 in Corsets and Crinolines by Norah Waugh. Waugh's description of the corset is as follows: "Grey coutil corset, lightly boned but heavily corded. The spoon busk, and the fact that it is very stiff–steam moulded–means it must be 1873 or later, but the shape is still that of the 1860's, and the basque is very wide" (80).


This corset was my second time using the technique of cording but my first time in a corset for myself. Cording is the use of cotton or paper cord to stiffen, strengthen, and pad fabric. It also creates a lovely ribbed texture. Cording can be used in addition to or in place of boning; in this corset, the heavy use of cording means that less boning is needed to create structure. However, my need for strong bust support led to my decision to use spiral steel boning rather than baleen, leading to a heavier corset than the original. I chose spiral steel as an experiment, as I'd never used it before. Unfortunately, the steel tended to curve laterally, even within the boning channels, which meant that there was less support parallel to the bone, leading to wrinkling. I also liked the idea that I could floss through the spiral steel bones. Flossing is a technique in which decorative stitches are used to hold the edge of a bone to prevent movement and decrease wear. Using thin baleen, spiral steel, or pre-perforated materials, flossing can go through the bones rather than just the edges. However, it was too hard to penetrate the boning channel to floss, leading me to wish I'd stayed with flat steel boning instead.
I modified this pattern directly from Corsets and Crinolines by Norah Waugh, digitizing and stretching the pieces to fit my waist size. I combined the two triangular lower side-back pieces and adjusted the new shape to decrease the width and smooth the bottom edge. This wound up needing alteration later on, as the shape was wonky and too wide; I wish I had simply cut out one piece as-is instead of trying to combine and reshape the two. I lost a significant amount of weight while making this, forcing me to trim some of the pieces after they were cut out, so the final pieces do not match the original pattern shapes. For example, there is one back piece missing on either side of the grommets, as I had to reduce the back by four inches. Two inches were taken from both triangular sections in the side-back, and the upper side piece was shortened by an inch on either side.
This corset was constructed using outward-facing seams that were then trimmed and covered with boning channels, with the exception of the busk piece, which uses an inward seam that is top-stitched down. Because there were horizontal pieces as well as vertical, there are also inward-facing seams which are pinked, cut in a zig-zag to prevent fraying.
An interesting thing to note on this corset is the intensity of the busk's curve. This was done for both comfort and silhouette, which favored a curved stomach. One thing I'm proud of is how well the corset holds its shape when not on a body. This is due both to the cut of the pieces as well as the cording adding body.
Waugh, Norah. Corsets and Crinolines. B. T. Batsford, 1954.