 Adia Sisson
 Adia Sisson
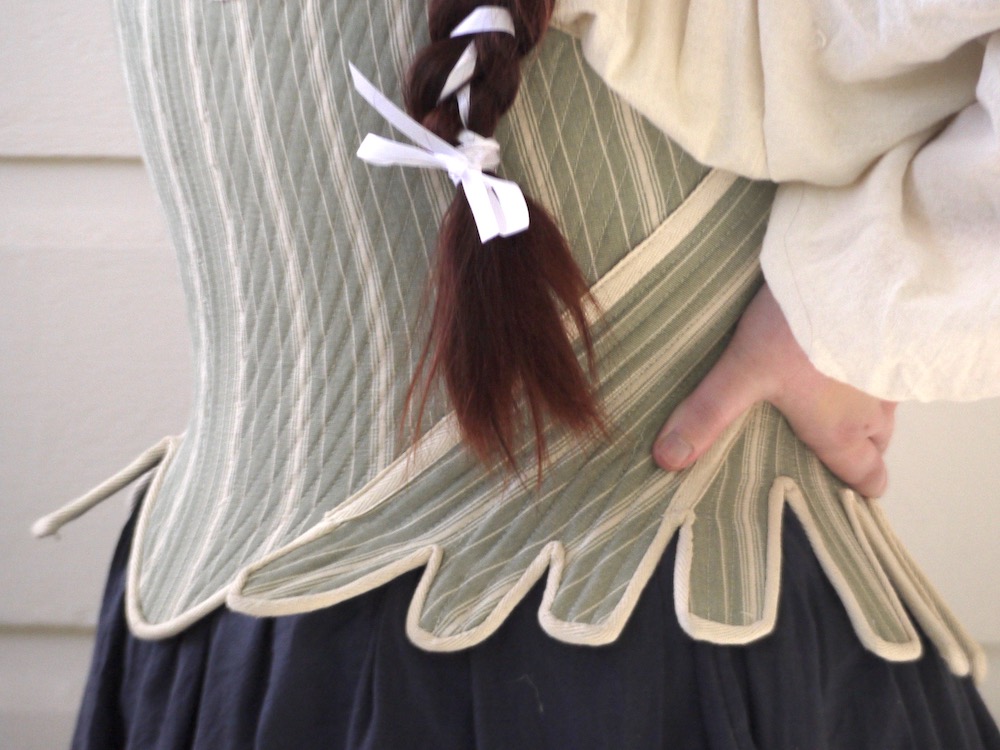
These green striped stays were my first successful foray into the world of 18th century sewing. Made from a custom-drafted pattern following the instructions in Patterns of Fashion 5 by The School of Historical Dress. These stays are fully boned using reeds with a spiral-lace back closure.


The theory behind 18th century staymaking is a simple cone, with the arc lengths based on bust and waist measurements. Curved lines are imperative to historical sewing, as the human body is naturally curved. In order for the waist to fit properly, it is drafted based on a pure circle, making the arc extremely curved so as to hold the waist tightly, without gapping.
Moving later into the century, the first pattern piece, roughly triangular in shape, also becomes more curved, which has the effect of thrusting the bust forward in a so-called "Proud Front". By keeping this edge straight, one achieves a more upright, contained shape, as in earlier 16th and 17th century stays. These green stipe stays are lightly curved, allowing for somewhat of a curving bustline while still being fully contained.
These stays were constructed using two layers of cotton canvas boned with reed. While traditional stays are made with up to four layers of linen, I was working off of a small fabric supply and could not spare more. Reed boning is a traditional method of stiffening, as it is flexible yet strong and forms to the body with moisture and heat. In my mockup for these stays, I also starched the fabric, which worked very well to create structure within the fabric. If working in very few layers, I highly suggest starching the fabric to stiffen it as well as strengthen it against stretching, warping, and wear due to bones. The pattern pieces are made individually, boning each piece fully and finishing the inside edges. The pieces were then whip-stitched together by hand with doubled and waxed thick cotton thread. This is the easiest and most structurally sound method of construction. When I first made these stays, they gapped in the back by about 5 inches, despite being drafted for my exact measurements. To fix this, I narrowed the problem down to one panel and ripped it out. After re-drafting the piece to be the proper width and shape, I remade the pieces fully and reinserted them into the stays. I then stitched some cotton twill tape atop the seam lines to cover my whip-stitching and finished the edges of the stays with the same cotton tape.